Both sides of the Wire
Recipe for Disaster - How to absorb shock, how to create it.
Back in 2019 I did an AAR of "Recipe for Disaster" (a scenario made for the UK module of Shock Force 2) over on TheFewGoodMen forums. It was a decent little BLUFOR defence scenario, but I ultimately lamented the scattershot AI plan that wasted what seemed to be a pretty strong force ratio in the Syrians' favour. The scenario is close to as nightmarish as you can get for the BLUFOR in the context of the fictional invasion of Syria. A British armoured infantry company is caught with its pants down, with no fighting positions or obstacles whatsoever, and bereft of intimate armour support. Bearing down on them is a combined arms formation of motivated and ostensibly well-trained Syrians.
The stage would appear set for a white-knuckle defence. To be sure, in the original AAR, I take more losses in men and IFVs than I am accustomed to, and it was an undeniably enjoyable scenario. Nevertheless, it was a bit anti-climatic, as the Syrians punched wildly in every direction and broke every rule of concentration and surprise.

At the end of the AAR, I had speculated as to what I would have done, had I been in the Syrian's shoes. I recently found time to put money where my mouth is, with gratifying results.
In this blog post, I am going to post both the original AAR where I am the UK defenders, and then contrast what the AI plan did with my own. The take away, it is hoped, is that with the right mixture of surprise, force concentration and violence of action, even a woefully "outclassed" force can achieve tactical success. I want to stress, as mentioned above, that the scenario is a nightmare one for the UK defenders, and I by no means believe it is a particularly difficult scenario for the Syrians when played by a human. It is clearly an ideal, but one worth showing just because of how demonstrative it can be of some basic tactical principles.
***
United Kingdom
Situation: It is the 27th of June 2008. The coalition invasion of Syria is in full swing. I am the commander of A Coy of the Scots Guards, an Armoured Infantry unit equipped with Warrior IFVs. My command is currently stationed at an abandoned palace at the edge of the Syrian desert, resting and refitting after a series of actions. The bulk of the brigade is conducting operations to isolate city of B’ir Basiri in advance of lighter units assaulting it.
This area was supposed to be quiet and clear, yet alarmed messages from HQ and dust clouds on the horizon herald trouble is afoot and it’s coming for us! Evidently, a Syrian force has managed to remain unmolested in the desert as intelligence and air assets focused their attentions on B’ir Basiri. Battalion and Brigade are organizing a quick reaction force and are promising us priorities from several indirect and air power assets. For now, I must look to the defence of my command with what is to hand.
Enemy Forces: Unknown. ELINT has identified radio-communications between what appears to be at least three separate callsigns. This suggests that the enemy approaching me may be a battalion in strength.
Key Terrain and Enemy Courses of Action: Much about the enemy is unknown, asides that they are advancing on us from the west. I have identified three general courses of action the enemy could take.

- Course of Action (COA) 1 is a thrust through the open desert to the NW, through a shallow dip of ground, into my left flank. While not visible in the above overlay, there is, in that dip of ground, a small palm grove
- COA 2, which I deemed to be more likely than COA 1, runs through a valley formed by four mountainous outcroppings. The valley is just wide enough to allow for the deployment of a combat formation in a series of wedges or in columns of platoons. There is also a palm grove in the valley that offers good cover and concealment, while the approach out of the valley has many small folds in the ground that could allow for decent fire positions.
- COA 3, which I feared the most likely, would have been the one I would have selected had I been the opposing commander. While the terrain in that third of the battlescape is generally open, it is only adequately covered by two pieces of key terrain, one of which is the palace itself, a position I do not deem an effective fighting position. If the enemy were supported by indirect fires and advanced swiftly and in strength they could easily break in and roll up my flank. Exacerbating the issue is that KT 05 is isolated and would be difficult to fall back from. It also lacked the vegetation other KTs had, denuding infantry of event that small measure of concealment. To the front of KT 05 is another small palm grove, in slight low ground, that could provide a good position to establish a support by fire.

Looking west towards KT 01 and 02.

KT 04, the palace, as seen from the enemy's point of view.

Looking west, from KT 02 into KT 03. This is the ground an enemy would have to cross if they were taking COA 2.

The view from KT 05, again looking west.
The plan:
As a result of the near total lack of information about the enemy force’s size, composition and greater objective, I settled for a defence-in-sector. However, that does not mean I fail to select alternate battle positions. My men all had access to armoured fighting vehicles, allowing for flexibility in the sector. As I had identified several courses of action the enemy could take, I selected obvious, though strong, positions that could fire on at least two of the three expected paths of enemy attack.
A series of engagement areas (EAs) were established, where I intended to open up on the enemy, if I had the luxury of being able to hold my fire.

Three hasty battle positions were selected, most with an alternate fall back. BP 3 was the exception, and required men to mount up and punch out to establish it. A note: the "LAV reserve" was larger than the image suggests, as for whatever reason some icons disappeared. The Coy 2IC, a spare javelin team and the HQ Warriors and Spartans constituted a meagre reserve.
Command and Control:
- BP1: Occupied by 2nd Platoon and its vehicles, reinforced by a Javelin section (and its track).
- BP2: Occupied by 3rd Platoon, reinforced with the company snipers and the FOO. The Coy Commander fought from its alternate in the palace.
- BP3: Occupied by 1st Platoon, reinforced by a FOO, JTAC and single javelin team.
Fires that were eventually scrounged together at various times throughout the battle consisted of:
- Battalion level 81mms;
- Two platoons of AS90s, for a total of 4 x 155 tubes; and
- A flight of 2 x Harriers in a light anti-tank loadout.
1820-1825 hours:
The action begins with enemy artillery landing near the palace; a mixed mission of air bursting high explosive and slow-building smoke. The palace, as I suspected, would be a magnet for fire and there are no losses among the few men emplaced there. BP2 reports BMPs in the area beyond EA 2. Reports begin to come in quickly from BP2 and 3 over the next few minutes. A particularly noteworthy report is that of an UAZ on high ground to the west of EA3. I suspect it belongs to an enemy forward observer team and luckily enough BP3 is best furnished of all the positions with forward observers. Harassing 81mm fire is ordered on the high ground to discourage or kill the suspected enemy forward observer. Post battle analysis later confirms that several scout teams and a forward observer had did moved onto that plateau and suffered casualties as a result.

At 1823 tank and auto cannon fire began to impact an area of scrub and bush, at that time unoccupied, to the right of BP2. Obviously this is speculative suppressive fires. The origin of this inbound fire was rapidly established to be coming from several platoon sized elements of T-72s, followed closely behind by BMPs. They advanced over the same high ground being impacted by my mortars, roaring into what I had identified as COA3 and towards EA3. By the end of the minute the entire company is aware of the enemy thrust and a rapid, coordinated reaction was as a result possible

BP2 had no javelins and was at any rate at this time completely masked by the enemy smoke, making their position useless. They were ordered to remount and, joining with the 2IC and his reserve Javelin team, assume a new, hasty BP. They would help with inflicting losses on this enemy thrust as they entered EA3. The overarching idea: Maximize the scant dead ground I had behind the palace and the mobility of my units. The goal was to have anti-tank infantry and then anti-infantry armour. As this shift occurs, the enemy thrust enters the designated free-fire zone of the Javelins at BP3. Two Javelins are fired by the detachment emplaced there, scoring a single kill. The Javelins displace rapidly to new locations within the BP.

As BP2's dismounts rush to their Warriors, an advancing T-72 acquires one that was, evidently, exposed. A round is sent crashing through the smoke and into the IFV just as a section had begun toremount. Miraculously, only a crewman is made a loss and the dismounts tumble out, panicked, but safe. They fall back to the palace, heedless to the world for the time being.
SITREP 1825 hours:

The end of minute 1825 sees a rapid series of developments: the 2IC’s attached Javelin team has already taken position in the Hasty BP and scored a satisfying kill. A Javelin at BP3 likewise bags another T72 from their new firing positions. BP1 starts to report the enemy thrust broadening out into EA2 and, more alarmingly, reports enemy dismounts and BMPs swinging out to the left, near a rise behind EA1. Finally, the radio squelches with the welcome announcement that the promised Harriers are at their checkpoint and ready to provide us with anti-tank air support.
1826-1831 hours:
The JTAC team begins to move into a better position to vector the air support into both EA2 and EA3. As that occurs, the small group of enemy vehicles that strayed into EA2 are engaged with good effect: a javelin at BP1 destroys a T-72, subsequently leaving the BMPs as easy prey to a pair of Warriors at BP1. The Warriors engage briefly, then duck back into their defiladed positions.
Even as this engagement is occurring the enemy vehicles and dismounts spotted at 1825 make their move. The BMPs duck behind a low rise and are not seen again for a bit, but over this little rise comes a large contingent of Syrian infantry, who fan out into a rough line and advance. Behind them on another small rise caused by the rolling terrain, a machinegun section takes position to support their advance. Shortly afterwards, the BMPs re-emerge, taking a forward slope position on this same rise, also clearly in a position to support the advance of their infantry. The dismounts in BP1 hold fire, waiting until the enemy close to within effective small arms range.

Realizing that this advance has humbugged the relatively thinly held BP1, who is now bereft of the support of their sister platoon , an Observer is dispatched from the palace when the word of the enemy advance reaches the Company HQ. He speeds to a small rise near the vacated BP2 to take a good position to call in a 155 mission on the enemy infantry. The mission is called in a linear pattern with medium, long, anti-personnel parameters.
I break my rule of ‘tanks only’ and order the Javelins at BP1 to start engaging the BMPs, displacing between shots – usually with 30mm chasing them out of their initial firing positions – so as to make it as safe as possible when my own infantry unmask themselves and begin firing. Then, inexplicably, the 2nd platoon leader opens fire prematurely on the advancing Syrian infantry, baiting a storm of return fire from the MMGs and remaining BMPs. Miraculously none of 2nd platoon get hit by the cannons or enemy fire and begin to calmly and accurately give the Syrian infantry something to think about. The javelins are not so lucky, as a team fires its final missile – with good effect – a 30mm round burst kills the gunner.
With a general firefight having begun the 2nd platoon’s warriors begin to take firing positions at BP1 and the vacated BP2, taking hull down positions for a few seconds at a time and displacing to a new position. Their cannons systematically rip into the supporting BMPs, reducing the pressure on their dismounts. However, despite all my precautions one of the Warrior’s is eventually hit and destroyed by a BMP’s anti-tank missile.

The Syrian infantry continue their advance in spite of their supporting assets systematically being destroyed. As 2nd platoon’s fire forces them to ground, they doggedly return fire with small arms and RPGs, causing a few of the defenders to become wounded in action. A pleasant surprise is had when Warriors, all the way over on the reverse slope of BP3 identify and begin to engage the Syrian infantry from the flank. A section of warriors at BP3 is given better firing positions and ordered to spray the area with coax. The goal is to keep the Syrian infantry pinned and in one position until the previously mentioned artillery mission finds the range. As the enemy BMPs begin to thin out the 2nd platoon’s warriors switch their own fire to the infantry and their supporting MMGs, the enemy thrust into EA1 is rapidly disintegrating into a mob.
By 1831 the entire battlescape is brimming with fire. EAs 1 through 3 now have targets in them and almost every element of the company is engaged. 3rd Platoon dismounts in the hasty BP begin to acquire enemy targets in the vicinity of both EA1 and EA2; what appears to be a second machinegun section setting up to further support the hapless Syrian infantry are engaged from the scrubs and bushes and are forced to defend themselves with return fire – making their role as fire support defunct. The exchange of fire largely goes the way of 3rd platoon but they do suffer a few casualties. The Harriers also contribute to the engagement, apparently with excellent effect, hitting BMPs as they begin to move through EA2. Streaks of smoke from the high ground near where the Syrians were initially spotted hint at the presence of anti-air, though they are not successful in engaging the jets.

The plan at this point: BPs 1 and 3 continue to engage, with the Warriors switching their targeting priorities back to enemy armoured vehicles. The Company 2IC, with 3rd platoon’s remaining warriors at the ‘hasty’ BP4 will take firing positions to add their weight to BP1s engagement.
1832-1842
The enemy infantry pinned in BP1 hug earth and return fire, often firing their RPGs at excessive range in an attempt to hit the Warriors that continue to menace them. Syrian mortars begin to range in on 2nd platoon’s dismounts in BP1, which causes me considerable anxiety. While the firefight is going my way the sheer number of Syrian infantry pinned down and firing at 2nd platoon’s infantry (who are slowly accruing casualties) make it too risky to currently disengage, so the best I can do for now is sit tight and hope the enemy fire mission is inaccurate. My own artillery at 1832 begins its own fire for effect. Similarly, the Harriers continue to smash unseen targets at the western edge of the battle zone, apparently hinting at still-fresh enemy forces entering the area. The tell-tale spires of acrid black smoke confirm as much. The Harriers expend their remaining ammunition in this manner and bug out of the fight, their job magnificently done.
By 1834 the enemy mortar fire is hitting in the vicinity of BP1, thankfully well to the rear of the platoon. Our own artillery fire however, hits with devastating accuracy and effect. Syrian infantry are downed in heaps under the air bursting 155mm shells.

Enemy mortar fire begins to hit the other BPs as well, prompting hasty remounts.


The enemy artillery fire coincides with a spot report at 1836 of additional enemy armour, in platoon strength, moving into EA1 and towards the Syrian infantry. The arrival of this armour marks the end of the fight at BP1, the survivors of 2nd platoon are ordered to disengage, pushing through the mortar fire in their rear and to their planned alternate position. We're winchester on long-range anti-tank ammunition, and lacking any armour of our own means that BP1 would be a death trap for my exposed infantry. Their warriors also move with them to the rear. The infantry uses them to resupply and grab as much LAT as possible before taking up their new positions.
The hasty BP is likewise evacuated, with the 3rd platoon falling back into the palace proper. By 1838 every unit has moved into alternate fighting positions and has restocked on as much LAT as they can. Luckily the Syrians are not punching forward with as much impetus as they were doing when the battle first began. A lull sets in for several minutes as the Company HQ observes a handful of enemy armour vehicles and a single tank begin to push cautiously through the middle. The fire mission that had been pounding the Syrian infantry with terrifying results is called off; across the entire front the enemy advance restarts, slowly.
A single question was at that point on my mind: Where in the hell was my promised quick reaction force?
I am not left wanting for long, by 1840 the cavalry arrives, much to my relief. Their timely arrival obviates the need to rely on a close-in defence on the reverse slope. It only takes a couple of minutes for the leader of the tank troop to liaise with the Company 2IC and get the brief on enemy contacts and locations. While this happens, the Company commander observes the Syrian T-72s pulling back into EA2, dispersing among the little rises and mesas. A curious, though welcome, decision for the Syrians to make.

By 1842, the Challengers have been brought into ‘the know’ about the battlefield situation and an aggressive, hasty counterattack has been drawn up.
1843-1846:
The Challengers take a battle position near the original BP3 while they wait for the smoke mission, ordered from the Palace observation point, to fall. They promptly spot and engage a pair of T-72s in the vicinity of EA1 upon taking their position. The enemy now appear completely dislocated at this point; even as the T-72s pull back into EA2 and the immediate surroundings, BMPs are seen speeding towards the vacated BP1. They are rushing headlong into 1st platoon’s alternate battle position in the reverse slope and are handled easily by the warriors interposed between the buildings.

A lone platoon of Syrian infantry remains in good order and pushes onto BP2, though are kept at bay by the riflemen now in position at the palace with ease.

By 1845, the smoke is falling and building in a gap between rocky mesas, masking the counterattack which kicks off shortly after at 1846. The column is motoring forwards, putting down marching fire, when the battle ends.

BLUFOR ENDREP:

A short, sharp battle, though many lessons to reiterate none the less:
- Have a plan, even a skeletal one;
- Have alternate and successive battle positions;
- Know when to pull back;
- Always endeavour to separate armour from infantry and to have an efficient engagement plan; and
- Conduct counter-recce, with IDF if need be.
There are lessons to learn from the AI Syrians as well, which I intend to demonstrate below. They are:
- Maximise surprise, assemble sufficient mass whilst the enemy cannot threaten your flanks;
- In this type of terrain stay mounted as long as possible whilst on the offensive. Speed is key; and
- Co-ordinate indirect fires, it must serve a purpose beyond destruction most times. No fire without manoeuvre, no manoeuvre without fire.

Syria
I am going to forego the usual terrain and force analysis, as it doesn't change terribly much from the other side of the wire. Much like the attack itself, we're going to keep this portion of the AAR short and sweet.
I will remind you, however, of what I thought aloud back in 2019 (and, of course, above):
" COA 3...would have been the one I would have selected had I been the opposing commander. While the terrain in that third of the battlescape is generally open, it is only adequately covered by two pieces of key terrain, one of which is the palace itself, a position I do not deem an effective fighting position...."
I lamented how, ultimately, what looked like a promising AI plan degenerated into a bunch of diffused thrusts. I also took exception with the pace, which I thought was dreadfully slow, and allowed me time to mass my force multipliers. Now, it is obvious to me that these were concessions from a skilled scenario designer to (a) capture an army that is believed to have a shaky grasp of doctrine, and (b) make the scenario enjoyable to a BLUFOR commander. It is a scenario meant to be played as the defenders first, and it shows. That being said, I don't need to observe such niceties when I put myself in the Syrian battalion commander's shoes. The takeaway is that there must be violence of action to effect real shock effect. With the background of the scenario suggesting we have caught a UK company unawares and unprepared, it is an ideal scenario to demonstrate this.
Scheme of manoeuvre
Let's get right into it. I ultimately have under my command a Battalion (-), with two rifle companies and the equivalent of a tank company. The majority of the tank company is equipped with the TURMS-T thermal sight and independent commander's sight system, making them quite competitive insofar as situational awareness goes. It will also allow them to engage targets through the smoke barrage, evening the playing field a bit. Unsurprisingly, they form the bulk of my initial striking power.
The plan is simple. The lead company will assault on the left, right flanking, in columns of platoons. One of the two on map tank platoons is distributed amongst the BMPs, and will provide intimate support for the entire battle. The second on-map tank platoon will cover the exposed right flank of the company as it pounds forward, taking SBF positions in the palm grove. H-hour, by way of reminder, is 1820 hours.
Fires, which turned out (to my chagrin) to be quite light, will strike two pieces of key terrain with a platoon of mortar tubes each, keeping any Javelin gunners' heads down. The third platoon will mask the palace; which will do little against javelins, but at the very least will blind infantrymen and confuse their understanding of the minutiae of my movements.

The infantry will stay mounted for as long as is possible, and remount swiftly once resistance is broken in the immediate area.
As one can likely surmise from the map, the intention is to break in swiftly on the British right and roll them up, taking them in enfilade whilst doing so. It is "keep it simple, stupid" in full effect.
The attack

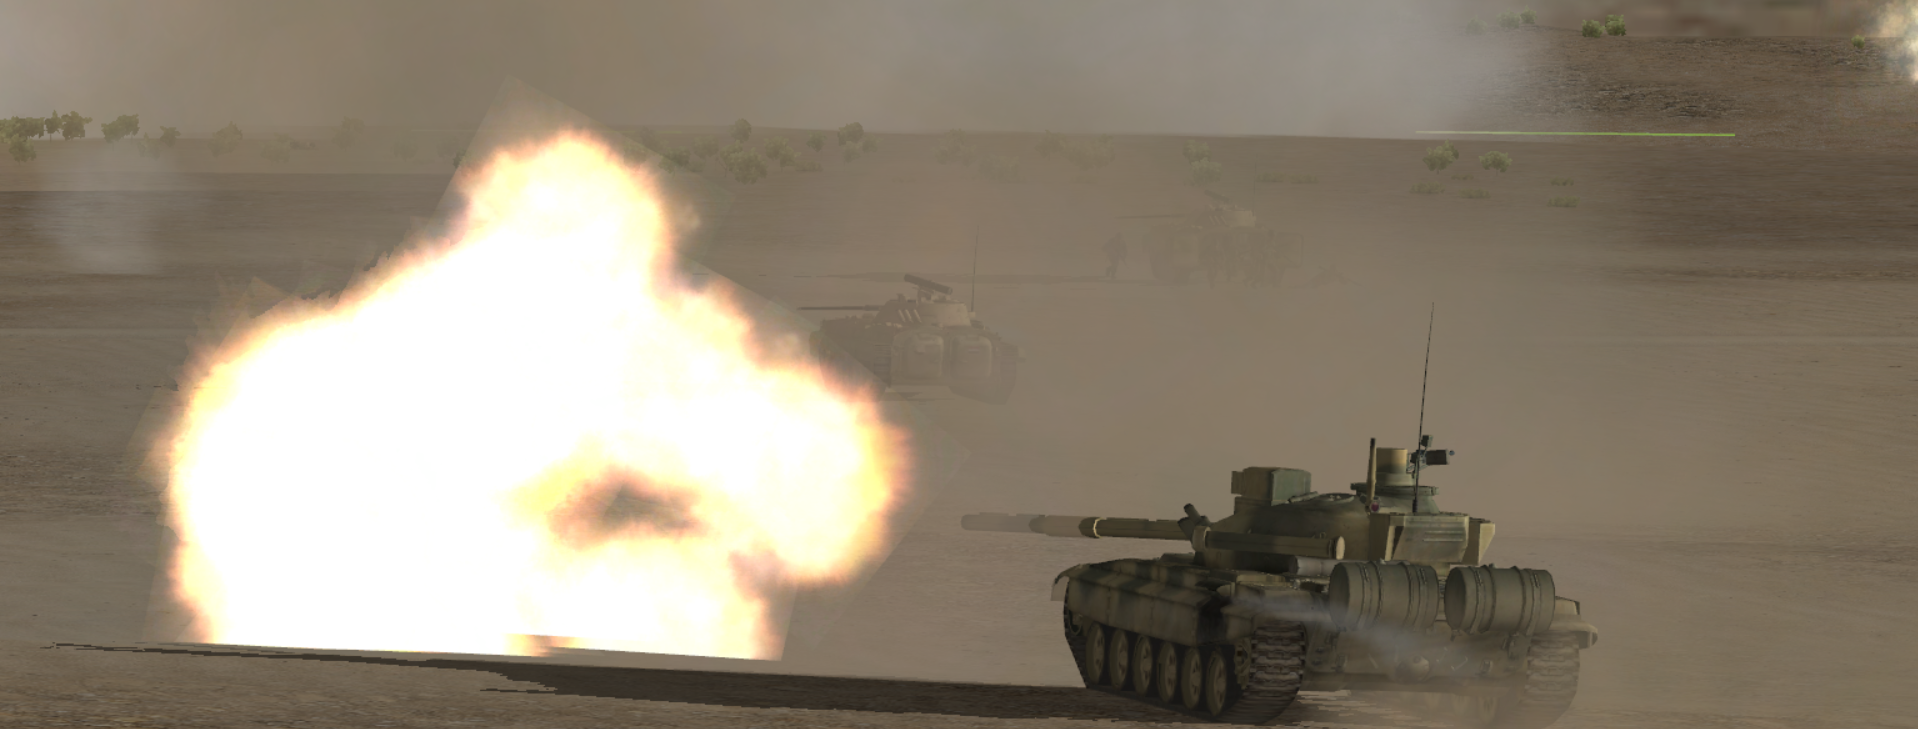
Action begins almost immediately. A T-72 identifies and engages an enemy Warrior, which was attempting to reverse into an appropriate firing position just in front of the palace.


Simultaneously, enemy 155mm fire impacts in the path of the attack, knocking out two BMPs and almost striking a T-72. It's a dangerous fire mission but the bulk of the force pushes through at breath-taking speed and are out on the other side of the beaten zone in less than a minute. Surviving dismounts are able to escape despite the crushing fire.


The Javelins are conspicuous for their absence. Only a single T-72 is engaged and destroyed by this often-decisive anti-tank weapon.

As my indirect fires build to a crescendo and T-72s begin to slow their pace of advance to allow for crushing marching fires on likely/suspected enemy positions, the anti-tank fire abates entirely. As Miller (who runs his own fantastic blog) is fond of saying, Javelins are not a wonder weapon. The same tactics you employ against any hard anti-tank threat are equally valid here. Excellent use of terrain, and violently applied fire and manoeuvre will work just as well as it always does.
In less than 3 minutes, we're at our intermediate objective on my left flank. The lead T-72 shrugs off some light AT from stalwart enemy riflemen and pushes up and over the rise.

From the support by fire position, the surviving two T-72s put down withering fire on enemy infantry spotted in the chaparral surrounding the palace, the TURMS-T system allowing them to identify movement through thick smoke and swirling dust.

I've broken in, now it's time to roll up. Roaring right through bewildered riflemen, the columns of platoons begin to deploy on line, wheeling to their right. Near the road that runs to B'ir Basiri, one of the platoons catches a bunch of enemy tracked vehicles still in laager. Likewise, they begin to hit from the flanks Warriors in the reverse slopes of the very same key terrain I used to such good effect when I was in the shoes of the BLUFOR commander.


Enemy losses begin to rise at dizzying rate, and it becomes evident that chaos is starting to set in among the enemy ranks.

So rapid is the advance and break in that in addition to catching enemy IFVs in laager, we catch (with predictably gory results) what appears to be a platoon still mounted punching out to this flank. This would explain why so little resistance was encountered to our direct front.


The first dismount of the battle occurs, as my riflemen engage and destroy the isolated teams of enemy riflemen that so boldly made a go at the armour a few minutes back.


While that micro action occurs, the rest of the company presses up to some shrubbery near the palace - the very same position I had established a hasty BP as the BLUFOR. The platoon vehicles mop up some scattered enemy infantry (most of them appear to have been equipped with javelins) and disgorge dismounts to take the palace itself under small arms and autocannon fire.
They are ably covered from the palm grove, who intervene decisively when some 30mm fire impacts on a friendly BMP, disabling the radio and killing/wounding the gunner.


It is now 1825 hours. It should be clear now to anyone reading that the enemy's goose is well and truly cooked. Now its time to make sure they understand that.
SITREP 1825 hours:

Checkmate
With two platoons already forward, sweeping away confused enemy infantry, and most of the enemy's IFVs burning all around their initial positions, it is time to press my advantage. My third platoon reorganises in cover and confers with the company and battalion command groups. They are going right in for the palace in a no frills assault.


The roar of a jet is heard over the battlefield whilst this occurs, but nothing ever comes of it. I'm grabbing the enemy by the belt, at this point, so that is hardly surprising.
Under machinegun, autocannon and tank cannon fire, the assault on the palace goes in. Despite the outer walls on the upper storey collapsing from the combination of fire, several of my men become casualties. Some diehard enemy infantry fire from the second storey and a violent point-blank firefight erupts.


Enemy indirect fire finally punishes the inactivity of my weapons platoon, which has been in position for several minutes whilst supporting this final assault. Air-bursting mortar rounds wound and kill several machine gunners and drive the platoon back to their BMPs.

This little episode is precisely why I lamented the plodding pace of the AI assault. Here I am, idle for less than 3 minutes in a single position, and I draw withering indirect fires. Speed and aggression is your single best defence as the Syrians (or a generic OPFOR using their TO&E) to negate BLUFOR's insanely flexible supporting assets.
At any rate, by 1830 hours the rest of my force, a company team, arrive. They are templated to follow in the initial force's footsteps before swinging right to clear the small hills of any surviving enemy infantry. The force arrives in a shambles, however, and it will take several minutes to task organise them.


...the enemy call it quits and the Palace are declared secure.

Regardless, the fight is over. There can be no doubt that this was a shockingly swift victory. In 12 minutes an enemy company is destroyed for relatively sparse losses.
ENDREP:


Let's briefly recap. I had said in my original AAR that had the AI gritted their teeth and hurled themselves on my right flank, there would've been very little I could do to stop them. What more can be said? I was clearly correct back then when I identified what I viewed as the enemy's most dangerous course of action. While the BLUFOR AI's response was clearly far less robust than what I had done, I do not think the end results would've been terribly different. Had I been subjected to a similar attack as what I just conducted, the same ultimate end state would have resulted. My flank would've been rolled up and most of my company's IFVs destroyed or scattered. My infantry, no matter how excellent, no matter how stalwart, would've been facing very long odds indeed by that point.
The point is clear. No matter how much of an ideal this scenario is for the REDFOR, the basic principles of handling post-soviet forces are the same. Mass combat power, elect for a push rather than pull style of fighting, accept losses, fight your squads and IFVs as a single entity and move violently and with purpose. In a perfect scenario, like this one, it can only inevitably lead to decisive shock effect.
As always, hope you enjoyed the read. 'Till next time.
Comments
Post a Comment