Combat Mission as a Visual Aid: Bringing Tactical Vignettes to Life, Part II
Zone Recon to LOA Steelers

Reminder: Click on images to view them full-sized.
Not terribly long ago I said, when speaking about the CMx2 engine that what set it "apart from more traditional hex-based games or 'virtual tabletop' experiences, [are the fact that] things like terrain analysis, spotting and communication are a lot more fluid." I had earlier described the game as quite close to a "what you see is what you get" recreation. The point, of course, is that with careful use of the editor, you can create extremely high fidelity situations that reach an approximation of reality that is useful for professionals. Not, of course, to allege I am one. I am, nevertheless, about to rant at you for several paragraphs as if I was one.
I want to continue with this very loose theme. This time, you are joining me in playing another interpretation of a tactical vignette. The source vignette was first seen in a volume of ARMOR magazine, a periodical issued by Fort Knox and latterly Fort Benning by the chief of Armor. This is the tactical vignette called 98-5, which you can read at page 31 of this document. As the title of this post suggests, the mission is to conduct an armed reconnaissance of a zone, upwards to a code worded limit of advance.

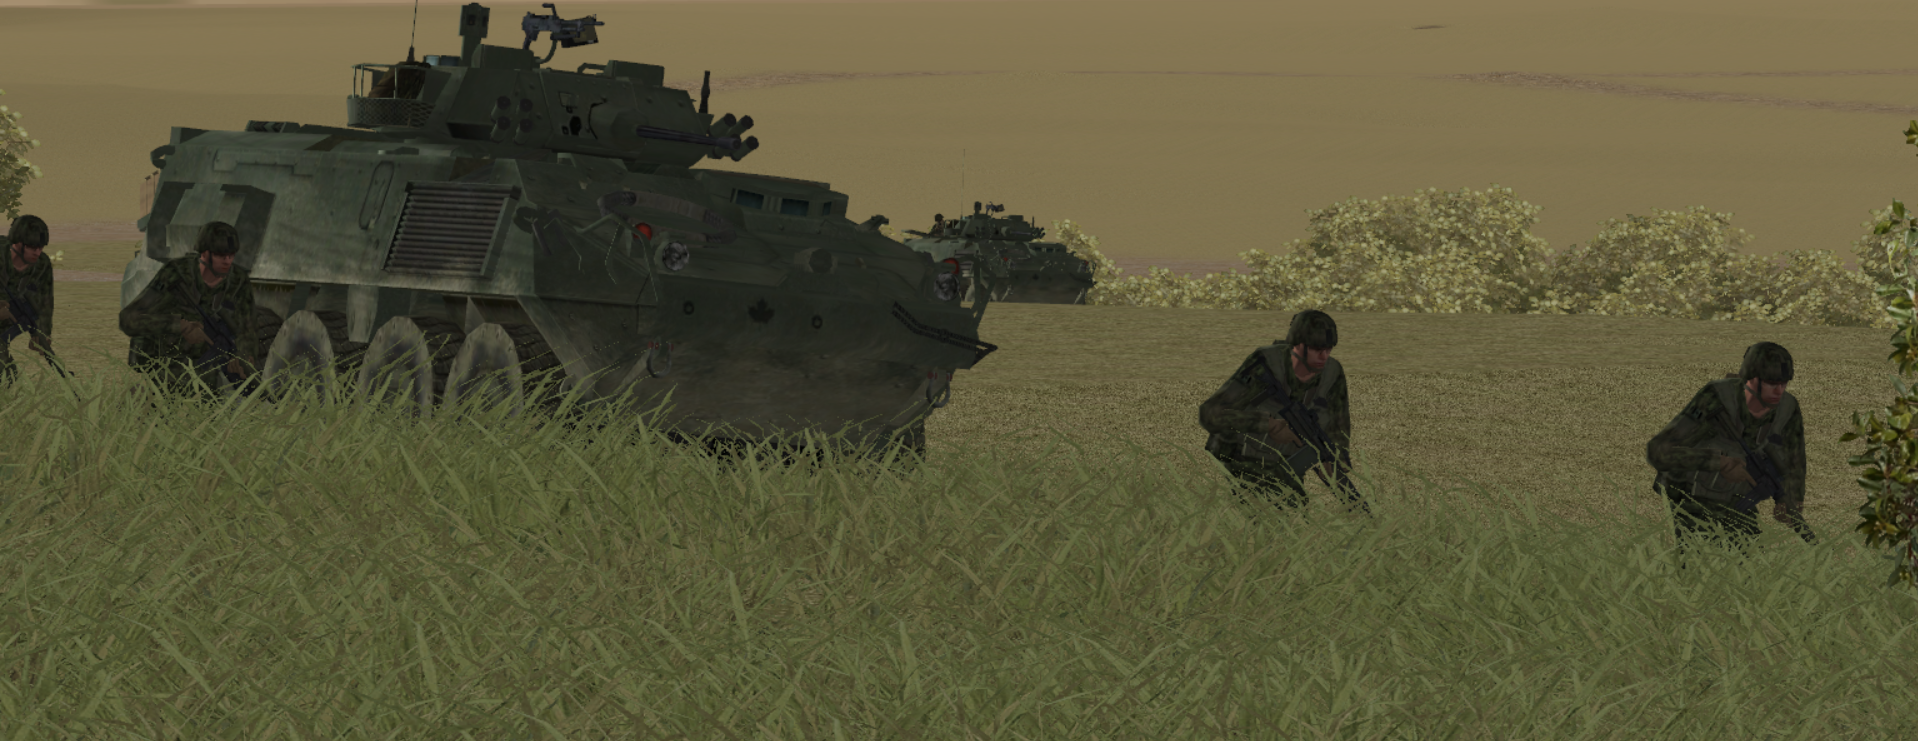
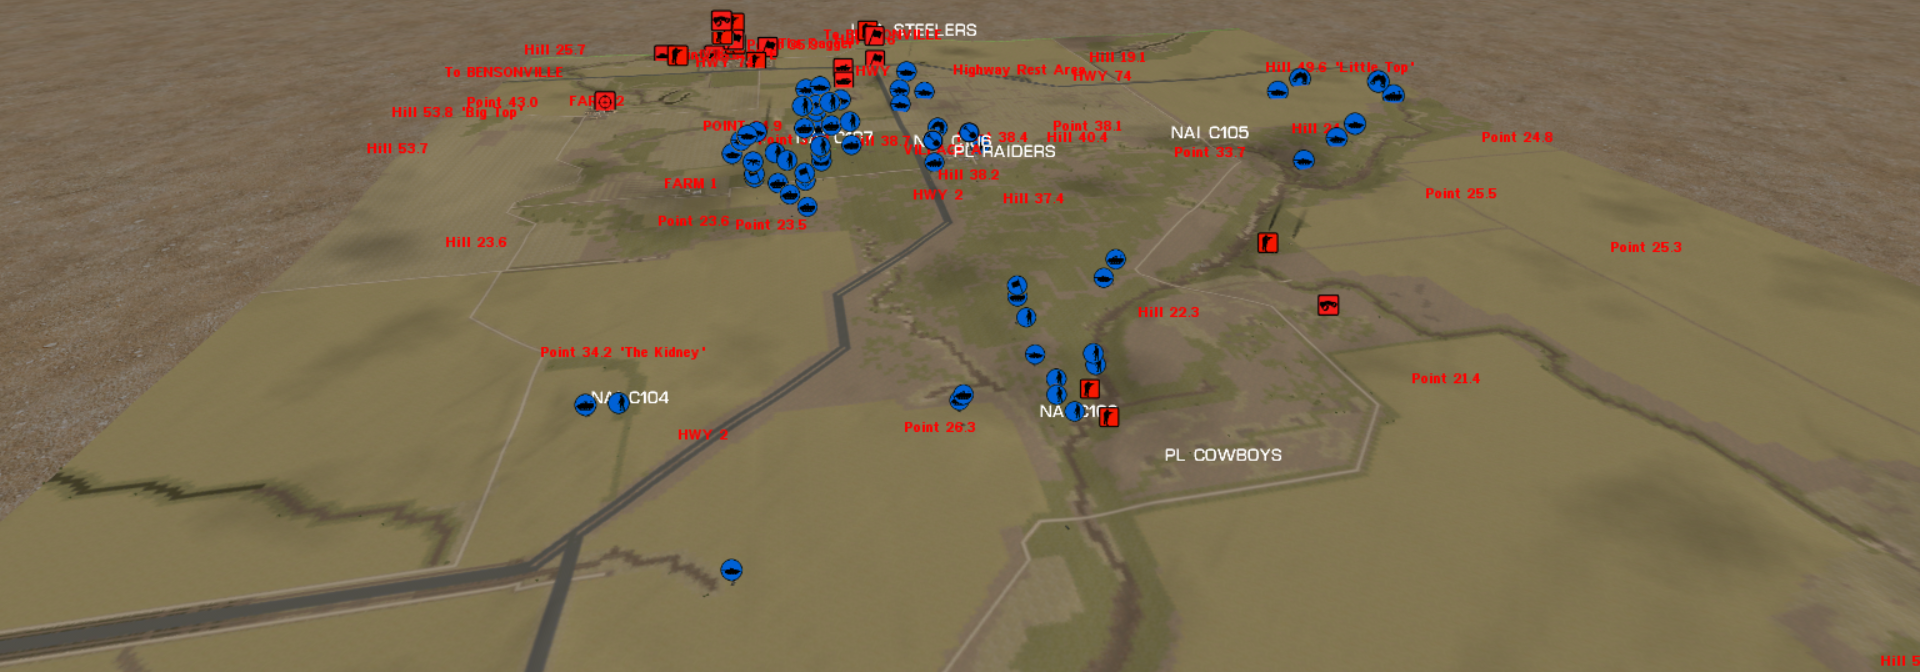
These vignettes are always light on details, and with a few exceptions tend to take place in (often, intentionally) a near-featureless desert. They're meant to test ideas and control in the abstract. With the CMx2 engine, we can do better. As you can see from below, the terrain has been fleshed out considerably by the mapmaker. It is infinitely more complex than the original source material, and while it is only using a small portion of the original map, you can see it has translated the concept well.

Deep ravines now bisect the map, there are villages along the ridges, and modern infrastructure livens up the map. These additional details allow you to suspend disbelief much more readily. It also means that alternative, realistic solutions apart from the 'textbook' can be brought into play. Microterrain, ground conditions and wind, and their vagaries from one scenario to the next, are able to shape your actions.

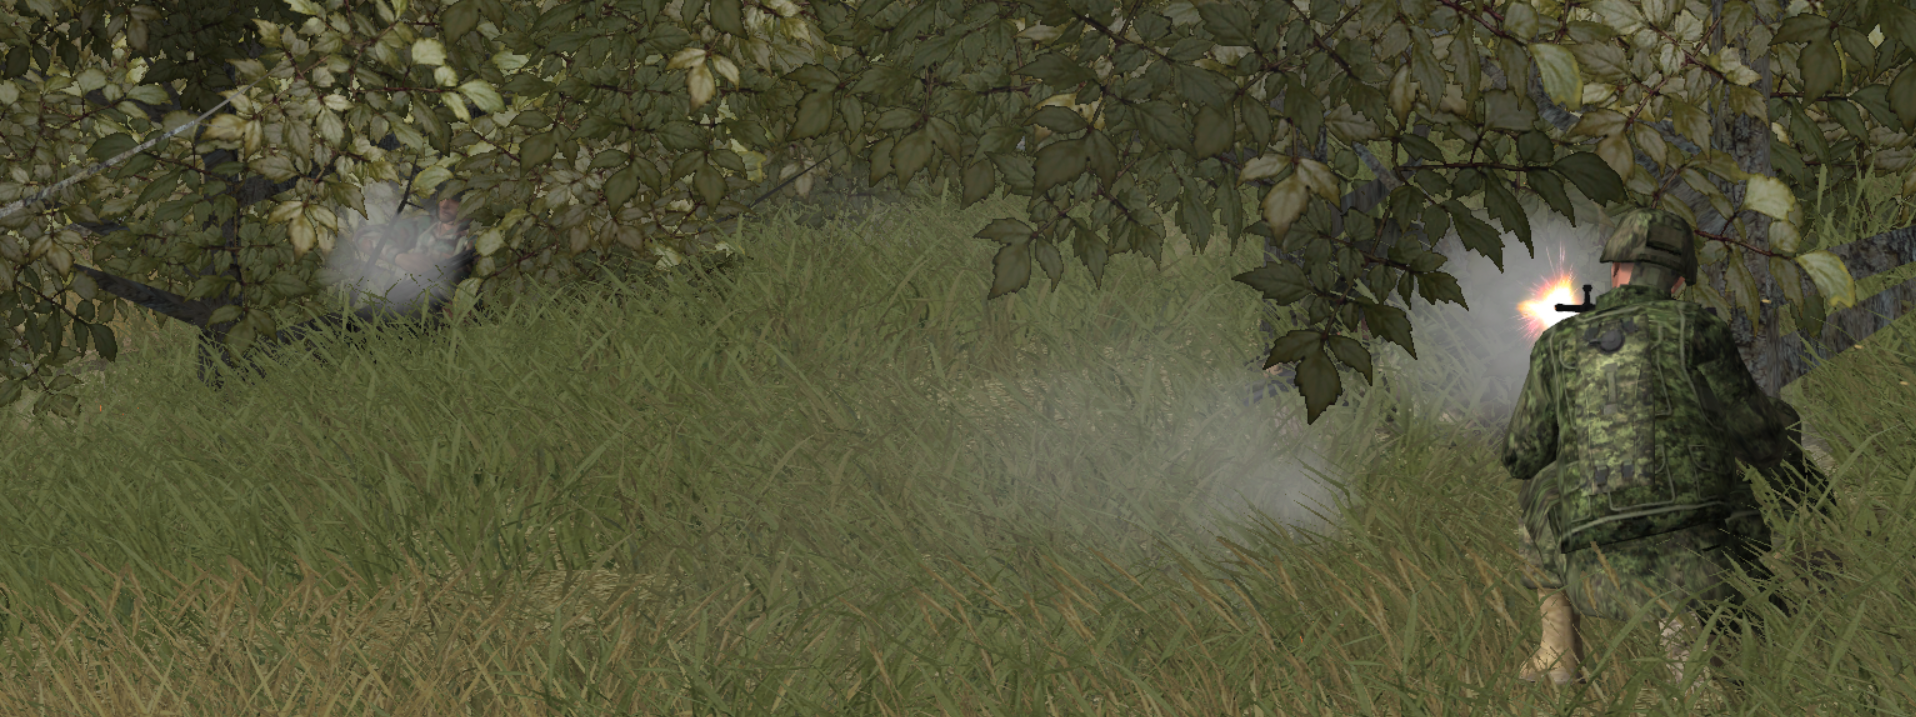
Having realistic looking terrain makes you think like a person on the ground, not someone far removed hovering above the battlefield (even if that is the case). It makes a world of difference.
Force and Tasking
Force
I am "Hammer 9" - the leader of an armour combat group consisting of 2 x troops of Leopard 2A6Ms, and "Horns 1", a mechanized platoon of infanteers from 2PPCLI. Together, alongside a group of FOOs from 1RCHA, and a section of pioneers, we form a combat group tasked with taking over the preparatory actions from "Catcher 1" - a part of the recce platoon that we lost contact with shortly before dawn. The 2PPCLI battlegroup commander is rightly worried that if we don't get an estimation of the enemy forces on the main objective (a fictional town called "BENSONVILLE") and clear key terrain in the path of the attack , the main effort planned for later on is going to get a very bloody nose indeed (if not face outright defeat).
The rest of my Squadron (Hammers 3 & 4) are attached to "Horns" - an Infantry mechanized combat group. They are the main effort for the attack on BENSONVILLE and will be passing through us. It's our job to ensure they get no nasty surprises and can take up good staging harbours safely.
Tasking
Our combat power is now being committed to investigate several named areas of interest and, if possible, clear out the enemy that may be in the vicinity. Failing the ability to dislodge them, ascertaining their precise strength and location are vitally important alternatives. There are several of these named areas between PL "Cowboys" and our limit of advance, numbered C103 through to C107.
Before we lost contact with the recce, they were able to communicate two pieces of information that are of immediate interest to my callsign:
They reported contact with enemy dismounts in the vicinity of C103. C103 is in the middle of an overgrown, muddy ravine: an excellent place for an ambush, and a well chosen location on the part of the OPFOR, as these ravines offered excellent covered routes into the dominating terrain.

Further, the recce reported contact with the enemy armour 500 metres to the east of VILLAGE A.

The enemy are likely holding strong-pointed positions forward of Village E, a very strong covering position for BENSONVILLE.
I have a relatively lean force and, potentially, the enemy are in the zone in as much if not more strength than myself. I will have to pick and choose my fight. If I attempt to reconnoitre over a wide area, I am very unlikely to find success. I will have to select one or two named areas of interest as my main effort, and break the battlefield up into manageable chunks. While the "main body" will enter the area of operations in around an hours' time (0700 hours), they are not meant to be decisively engaged. They're tasked with the initial attacks onto Bensonville tonight or tomorrow. When they arrive, they should be, at most, helping me destroy enemy observation posts and stragglers. Finally, my force is going to be the reserve for the main effort, and will likely be wanted to exploit any success. Keeping my own force fit for purpose is an additional consideration, as is so often the case.
Terrain
The area of operations is open, agricultural terrain interspersed with a series of hills. Three central hills roughly halfway towards LOA Steelers form a low ridge that divide the area of operations into two halves. This effectively masks the ground behind PL Raiders leading to LOA Steelers from direct observation and fires from my start line.

Centrally located on the middle of this ridge is a village ("A"). Behind it on a separate hill is a slightly larger village ("E"). These two villages constitute essentially the only built-up area in the vicinity, asides from a few small farms in the valley on my left flank, between these villages.
The predominantly agricultural terrain is broken up by two major highspeed carriageways (highways 2 and 74), and a series of low ravines/wadis that run up to the aforementioned central ridge. These ravines are generally thick with vegetation and have a muddy bottom in most places. The ground remains damp from last night's wet weather. I don't intend to make much use of them on account of these conditions.
Intent

As I stated earlier, I need to pick a single fight and win it with my initial force, rather than try to deal with all the NAIs. I choose to make my fight for NAI C105 and 106. My thought process is that securing the vicinities of NAI C105 and C106 ensures the safest possible entrance for the main force entering from Highway 2. In reality, and as an aside, clearing these areas of enemy and setting up observation posts here would strongly encourage the battlegroup commander to attack towards BENSONVILLE from the right flank, with this ridge as a good position for supporting fires and observation.
The plan is to debouch from the vicinity of Point 43.1 in wedge, conducting travelling overwatch towards Hill 24.7. The most likely positions of enemy fire (indicated in orange) will be hit by suppressive indirect fires. Hill 37.4 will have a smoke screen built on it for good measure. The open right flank is undulating, creating a good series of potential hasty battle positions if enemy fire is heavy enough that we need to switch to bounding overwatch and fight it out. Once we are in position, safe and away, on Hill 24.7 we can pivot effectively, rolling up the ridge to clear C105 and C106. A battle position on Hill 24.7 can both effectively interdict any efforts to reinforce from the direction of BENSONVILLE as well as support by fire efforts to advance through Point 33.7 and Hill 40.4.
Artillery Observation Posts (AOP) will be established in VILLAGE A, and between Hill 24.7 - Hill 49.6. This will both support further efforts to reach LOA Steelers as well as provided much needed observation to the (off-map) final objective and is in line with the spirit of my orders to help shape the main effort.
Further actions will be dictated by how many, if any, casualties I take in the effort to achieve the above. I anticipate, however, turning around to break up the suspected ambush at NAI C103 and leaving C104 and C107 to be secured by the following forces. Of course, these positions will be attacked by fires from my observation post in VILLAGE A and any of the many hills between PL Cowboys and PL Raiders.
NAIs C105 and C106
Pushing up to Hill 24.7
It is 0600 hours and "Hammer" group coils up in its temporary harbour behind point 43.1 while the forward observers organise the initial artillery fires.


Its not long until spot reports begin coming in on enemy contact. Two BMPs are reported in a treeline to the northwest of the wedge. One is destroyed but the unit rumbles past before the second can be effectively engaged. A platoon-shoot is ordered onto the treeline by the 1RCHA observers, anticipating that there's at least a pair of BMPs in the vicinity.


A T-90 is spotted as well in the vicinity of Hill 38.2 but pulls back out of sight when it is lazed by a Leopard. Artillery is ordered onto the vicinity in anti-armour profile.
Following behind the Leopards, in the safety of the centre of the wedge, are the LAV-IIIs of "Horns 1." Infanteers are unbuttoned and covering the flanks and rear of their mounts from the security hatches. They soon report taking small arms fire from the trees in the vicinity of Point 33.7. The infanteers button up, and the LAV-IIIs respond with devastating marching fire on the suspected enemy positions.

These LAVs wheel to the NW, with two intimate support tanks in tow, to spew their dismounts and investigate the last known position of the BMPs. The artillery fire previously ordered on the position lifts just as the ramps go down. The dismounts report enemy infantry falling back from the vicinity of Point 33.7 It is now 0606 hours.

The balance of the combat team reports itself at the base of Hill 24.7 as well.

After a brief pause to reorganise, these forward elements of the team push up onto Hill 24.7, taking up firing positions, just across PL Raiders. At 0608 hours they engage one T-90 (without effect) in the vicinity of Hill 35.6, and the T-90 reverses out of the sight in the vicinity of "The Dagger" map feature. A BMP is engaged, successfully, along Highway 74. At the close of this engagement, the earlier asked-for fires on Hill 38.2 also begin to fire for effect.
The friendly dismounts, who have begun cautiously pushing towards the BMPs last known position, report vehicular audio contact in the treeline and further to their right, in the Wadi. There appears to be an enemy MBT in the ravine between our positions on Hill 24.7 and the dismounts. Once this situation filters up the command net, the Squadron 2IC peels off in his MBT with Hammer 1B in tow. A messy, ugly, point-blank fight occurs as these Leopards attempt to outflank the T-90. The 2IC's Leopard is immobilized by enemy fire but the enemy is destroyed immediately in return. No Canadians are wounded in this exchange, but we are now a tank down.


Friendly infanteers play a dangerous game at very close range, supported by the intimate support tanks, and KO a second BMP-3. Its such close range that they pull back to their LAVs to stay clear of the secondary detonations.

The returning infanteers report likely contact with a third BMP, but I am simply not comfortable keeping them so near two burning BMP-3s, what with their propensity to extremely violent secondary explosions. Nor do I want to keep the tanks alone in such claustrophobic terrain. A repeat fire mission is ordered on the treeline in lieu of either option.
Sitrep
It is now 0612 hours and its been an extremely rapid and violent opening of the action.

Confirmed enemy neutralised include:
- 3 x BMP-3s
- 1 x T-90 MBT
- 2 x ATGMs
It is very likely that in addition to these confirmed "kills" we have destroyed an additional 2 ATGM teams (presuming, strongly, that they are fighting in platoons or batteries) and between 10-30 enemy dismounts.
We have also identified the following:
- 2 x T-90 MBTs
- 2 x BMP-3s
These spot reports are divided between the vicinities of Hill 38.2 and Hill 35.6.
In short: so far, so good. Our lunge towards Hill 24.7 has built up an appreciable picture of the enemy, destroyed hard threats and put softer threats to flight, if not outright neutralising them. We're well placed now to proceed with the push towards NAIs C105 and C106. The FOOs are bounding forward in their observation vehicles to take up ideal positions to begin hammering suspected enemy positions on the far side of the ridge.


By 0616 hours the entirety of Horns 1 is remounted and in assembly, behind Hill 24.7, with their intimate support tanks. Likewise, the artillery is falling on the third known BMP in the dense vegetation, the FOOs moving past the fruits of their labour as they bound forward.

NAI C105 and the heights
Between 0617-0620 hours Horns 1 and their support push up to C105 without incident and report it devoid of the enemy. They crack right on up onto Point 33.7, while enemy mortar fire impacts inaccurately well to the combat team's rear. I would like to think this is a testament to the wisdom of how fast and hard we struck in the first phase of this fight.


As the infanteers begin to sweep Point 33.7 on foot, our artillery observers (mounted or otherwise) take positions on and around Hill 49.6. They get to work bringing speculative fires down on likely vehicle hides and enemy fighting positions. Particular focus is given to small, forested rises along Highway 74, near where the last BMP-3 was destroyed.
As for Point 33.7, the infanteers report nothing but killed and wounded enemy dismounts, all ATGM teams, as they sweep on foot. To the west of point 33.7 in another copse of trees, they regain contact with the enemy, however, spotting enemy dismounts.


By 0625 hours the enemy position has been destroyed, with approximately ten enemy dismounts killed or wounded.

A brief sweep of Hill 40.4 confirms it is devoid of the enemy. Horns 1 reorganises, the infanteers remount and rebomb from their LAVs, and the intimate support tanks move forward to cover VILLAGE A.

"VILLAGE A" and C106
The next step for Horns 1 is to push forward and probe VILLAGE A. Clearing the village is not strictly speaking necessary, but it is my goal. Naturally, if it turns out to be too much for the infanteers to handle, I will settle for probing the NAI; content with knowing the enemy strength and disposition. The intent is to keep to the platoon's left as they move, keeping the ridge between themselves and any enemy positions on the high ground nearer LOA Steelers. As I originally intended, I am carving the AO into more manageable, digestible chunks.

I'm worried, however, about the thick vegetation that surrounds the village. I am choosing a potentially fatal funnel into the objective for the sole reason that it allows the LAVs and tanks to support the infanteers for as long as possible.

It is now 0628 hours. Horns 1 goes in. Without incident.

While the infanteers are dismounting and preparing to sweep the vegetated area, I decide I've had too many minutes of inaction with the rest of Hammer on Hill 24.7. I am not comfortable with having that many tanks in that small an area sitting relatively idly; it's ripe for a barrage. Hammer-2 therefore begins advancing in bounding overwatch towards Highway 2. It is a raised road and I am keen to have a forward battle position there to strengthen my ability to seal off the fight for C105 and C106.

Hammer 2 reports itself safely on its intended BP by 0635 hours, without incident.

While Hammer 2 is conducting its forward movement, Horns 1's infanteers make fairly rapid progress through the dense vegetation. Enemy fortifications on Point 38.4 are found to be devoid of the enemy. Enemy stragglers are engaged in the vicinity of Hill 38.2 by the pioneer section, and two enemy dismounts are swiftly neutralised. The engineers do not push further forward, as they report audio contact with a MBT nearer to Hill 38.2. The intimate support tanks are ordered to move forward to deal with that particular issue.
At 0635 hours the right-flank section reports coming under accurate small arms fire from VILLAGE A itself. In this initial exchange of fire two enemy are reported neutralised.


The fortifications on Point 38.4 allow for a good, covered approach, to the houses the enemy appear to be fighting from. Solid, bread-and-butter fire and manoeuvre allow the men to close in without any casualties. Eventually the platoon weapons are able to put themselves into a good position to support the push and the position is silenced by GPMG and Carl Gustav fire. Five enemy are confirmed killed or wounded as we enter the village.
At 0640 hours the intimate support tanks make an effort to locate and destroy the reported MBT on Hill 38.2. Another white-knuckle, point-blank exchange occurs. The T-90 fails to hit, as does the initial Leopard, but the T-90 is struck from the flank by the wingman tank. It burns immediately.


These Leopards also confirm a BMP destroyed in the artillery-beaten zone earlier.
The infanteers at this time have a firm foothold in the village and are engaging another section-sized force further in. Again, the winning recipe of Carl Gustav fire and close assault result in the enemy position being destroyed. This time, however, we suffer one man wounded in action in the close assault. From the newly captured position, the assaulting section also destroys a RPG-29 team that they inadvertently take in the flank.


The reserve section puts a bookend on the fight for VILLAGE A when, whilst conducting a follow-up sweep to ensure the forward observers have no nasty surprises, they engage yet another section-sized force. The enemy are swiftly destroyed by a flank but do critically wound yet another friendly infanteer in the initial exchange of fire.

Battle position at Highway 2
Hammer-2 has not been idle, either. Having reached the raised berm of Highway 2 they begin to conduct a series of berm drills over the next several minutes, scanning for enemy targets.
At 0640 hours, Hammer-2 destroys a T-90 in the vicinity of "The Dagger" map feature.


Two BMPs are also identified in the vicinity of Point 24.9 and the troop jockeys to engage.
At 0642 hours one of these identified BMPs is engaged and destroyed by Hammer 2B.


Hammer 2B chalks another tally for himself when the second BMP is destroyed by his callsign during a berm engagement at 0644.

These dual actions close with a report from Horns 1's remounting infanteers of an enemy MBT in the vicinity of VILLAGE E.
NAIs C103, C104 and C107
Sitrep

By 0650 the situation is as follows:
- We are well on our way to establishing an OP in Village A, where approximately 25-30 enemy dismounts were neutralized.
- OPs have been established for some time on 49.6, and have identified and likely destroyed with fires a platoon of dismounts in fighting positions.
- Hill 38.2 is now devoid of the enemy, with 1 x BMP and 1 X T90 confirmed destroyed.
- Horns 1 is reorganizing for the previously templated sweep to NAI C103, alongside its intimate support tanks. They will be supported by a preparatory barrage from the 120mm mortars.

- Horns group will sweep and clear C104 and C107 in bounding overwatch, linking hands with Hammer group.
- Hammer 2 goes firm in a hasty defensive position, oriented generally to the NW.

Dealing with the T90 in VILLAGE E
While Horns 1 reorganizes, steps are taken to deal with the T-90 reported in the vicinity of VILLAGE E. It appears to be using a house to cover its left flank, shielding it from the attentions of the Hammer 9 and Hammers 1B and 1D. Artillery rubbles the house at 0652 hours, and Hammer 9 knocks out the T-90 before it can effectively pop defensive smoke and displace.
The fight for NAI C103
By 0654 hours Horns 1 is ready to begin its sweep to the south, and it is only waiting the fire for effect on its supporting mortars to step off. The intimate support tanks from Hammer 1 are, of course, ready to move with them.

At 0657, with 120mm mortar rounds bursting all up and down the ravine surrounding NAI C103, Horns 1 goes in for yet another attack.

One supporting tank and two sections dismount to the rear of NAI C103. One of the sections dismount, moving into the ravine, while the second remains mounted as a reserve. The LAVs spray down the heavily vegetated area. The rest of the platoon, with the other supporting tank, hooks right. While they do so, they quite literally run over a very surprised observer party of the OPFOR, who are neutralised by infanteers firing out of the rear security hatches as they drive past.

By 0702 we have firm confirmation of enemy dismounts in the vicinity of NAI C103. They are initially engaged with a combination of small arms, 25mm and 120mm direct fire with devastating effect. This first exchange of fire goes completely Horns 1's way, and an enemy section and RPG team are destroyed.
However, as the friendly infanteers push into the thick vegetation, the fight gets bloody. First, there's a blue-on-blue incident that kills two friendlies and results in a "ceasefire" order being given to all the LAVs. Then, a furious grenade duel results in three more friendlies being wounded.
Securing NAI C104 and C107
While the fight rages in the confines of the muddy ravine, the Horns combat team begins to arrive. First to enter the AO are Hammers 3 and 4, the cross-attached armour troops. They take up hasty defensive positions in the trees on either side of Highway 1 to get their bearings.
At 0704 hours, the OP established in VILLAGE A reports at least one BMP in VILLAGE E, with more suspected. Enemy dismounts are seen exiting the vehicle and moving through the village to a trench system to its front. Anticipating this is the first of many dismounts, the OP calls for a full battery shoot on the built-up area, with a ten minute delay. The hope is the delay will better allow the Horns combat team to be in an attack position by that time. The OP's suspicions are confirmed a minute later at 0705 hours when he reports multiple groups of enemy infantry moving through the village, while a small group of armour (1 x T-90, 3 x BMP-3) appears to be trying to push past the village to the right (my left flank).
This enemy armour group never gets the chance to make mischief. As they press to the forward limit of the village, Hammer 9 and his battle positions astride Hill 24.7 and Highway 2 deliver a pair of devastating volleys.


In rapid succession, three BMP-3s and an additional T-90 are destroyed.

By this time, Horns 9, 2 and 3 have arrived. Breaking up into two equal groups of 1 x Tank Troop, 1 x Mech platoon, they begin leapfrogging in bounding overwatch. The first group takes NAI C103 at a bounce, clearing out enemy observers from the area. Things do get messy when a surviving enemy throws a lucky grenade and wounds 3 friendlies, but otherwise the area is cleared swiftly. From C103, the pair of platoons is able to cover the rest of the combat team as they sweep forward to C107.

By 0709 hours a troop of leopards and a platoon from the Horns battlegroup have pushed up to NAI C107. Made aware of the enemy movements to their front from Hammer, they begin a battle position engagement from the ridge, knocking out an additional BMP. They also begin delivering devastating direct fires into VILLAGE E, pounding the dismounts who are trying to set up a blocking position.


By 0710 hours the Horns group has formed up in the vicinity of NAI C107 and is assembling an assault group behind the cover of Point 37.8. They are just waiting for the delayed fire mission to fire for effect on VILLAGE E, before they take advantage of the enemy's disorganisation with a hasty frontal attack.
However, at 0712, and concurrent with Horns 1's success in the vicinity of NAI C103, the enemy call it a day and pull back surviving elements (that are able to do so) towards BENSONVILLE. Stragglers are pulled out of their various hiding places by our callsign's infanteers throughout the day, either being killed or taken prisoner, while the rest of the 2PPCLI battlegroup begin the preparations for the main effort.
With firm observation on the enemy's main positions, 1RCHA begins to take a devastating toll on the OPFOR's attempts to reinforce, move, and dig in. Long-range direct from Horn's supporting armour adds to the slow, but incessant drain on the enemy's main battle position. The evening's assault has been shaped as best it can, in other words.

Debrief
I think the main thing to take away from this scenario is how it was a true combined arms affair. Normally when you read "combined arms affair" in CM what that translates to is "my infanteers walked over a scorched pile of corpses after massed tank fires." However, the complexity of terrain, coupled with the need to get a firm recce of NAIs in said terrain, means that every part of the combat team saw equal use and carried equal weight.
The proof is in the pudding:
Tanks...


Infanteers/LAVs

The dispositions at the end:
That's it. Things went basically to plan, which I consider a bit of an outlier. So with that said, I'm going to just say I hope you enjoyed reading as much as I did playing!
Edited 21.03.22
I've actually had a sleep on the above and I think, now, I am comfortable with a more detailed analysis of the mission. As I stated above, the battle did, essentially play out as I had hoped and envisioned. While its easy to dismiss this as good luck and an outlier (however true this may be), it is equally true that it was the right solution for this situation. My stated intention was to pick my fight for a small section of NAIs, apply combat power violently to them, and then proceed from there.
I linked above to a document which collates a bunch of these "Tactical Vignettes" from the ARMOR magazine, but never really bothered to read the solutions submitted by the readers or the one proffered by the vignette's authors until now.
What did they do?
The author's solution for TV 98-5 is issued as a FRAGO, so I will do my best to summarise it, as I find modern military-types often don't seem to understand the "Fragmentary" part of FRAGO. His concept of manoeuvre states:
We will move quickly in a company wedge, assuming risk to PL COWBOYS. We must make contact with [THE RECCE] and use him to assist us through-out the mission. We will set up vic PL COWBOYS, [3rd Platoon] will move quickly and begin to locate and destroy the DRT teams in zone. [1st Platoon] will move forward and destroy the CSOP in NAI....
In short? A violent thrust forward in a wedge, then once on initial key terrain, bounding by groups to begin reducing the NAIs. The solutions in the magazine won't line up one-to-one with the scenario in the game, as the terrain is more compressed in some places, vastly more complex in others. Let's read on and explore the rationale behind the above.
The three keys to the success of this mission are:
- Recognize that you can't do everything. You must clarify the TF commander's [intent]. Time is of the essence, and your resources are limited...focus your reconnaissance efforts.
- Fight the enemy, not the plan. You must quickly conduct a thorough [intelligence preparation]. Use reports from the scouts...continue to update your running estimate of the enemy situation...think from the enemy's perspective.
- Use all assets available...
How does it compare to the above?
- First and foremost, I selected my initial slice of the pie, I did not attempt to do everything (at once) and with the initial combat team I had to hand.
- Second and of almost equal importance, even before I was on Hill 24.7 I let how and where I encountered the enemy dictate my next steps. I did not rigidly stick to the plan, if we took contact to our front left from BMPs, for example, we made sure they were engaged effectively with direct and indirect fires to ensure they posed no threat to the flanks and rears of the formation. I made occasional sitreps for the benefit of the readers while reorganising my forces, and this captured how, in the moment, I continued to update my estimate of the enemy situation to a degree.
- That takes me to the final point, as the brief rundown of how enemy losses were spread around all the callsigns demonstrate, I made sure to use all assets with full effect. Direct and indirect fires were used with effective co-ordination to strike suspected and known enemy positions and keep my precious few dismounts healthy and whole for when they were needed most.
When you have relatively vague guidance from a briefing, a large AO for your forces, and multiple objectives, you need to use your common sense, key understanding of your combat team (in this case, armour heavy) and terrain analysis to select which objectives are decisive, and how you wish to approach them. I had few dismounts and a lot of tracks, with plenty of IDF. The ground was damp and extremely muddy in low ground. An penetrate-and-infiltrate approach was never going to be wise. Hence the violent push to flanking terrain and the NAIs I deemed most important (those that, if held in strength, could interdict the entry of the balanced combat team).


Comments
Post a Comment